A solitary George Barber goal was enough to give the Division 6 leaders a 1-0 semi-final victory over Division 5 top dogs Pelham Arms in the Adelaide Cup.
Their reward is a showdown against Fort Cumberland, who sit second in Division Five, at Westleigh Park on Sunday, May 14.
The win came a week after Saturn had thumped White Horse Reserves 7-3 at Cams Alders to lift the Portsmouth & District FA Sunday Plate silverware.
And four points from their remaining three league fixtures will see them crowned champions.
. Action from Saturn Royale's 1-0 win over Pelham Arms (blue and yellow kit) in the second Adelaide Cup semi-final
Action from Saturn Royale's 1-0 win over Pelham Arms (blue and yellow kit) in the second Adelaide Cup semi-final. Picture: Keith Woodland (300421-1151) Photo: Keith Woodland
. Action from Saturn Royale's 1-0 win over Pelham Arms (blue and yellow kit) in the second Adelaide Cup semi-final
Action from Saturn Royale's 1-0 win over Pelham Arms (blue and yellow kit) in the second Adelaide Cup semi-final. Picture: Keith Woodland (300421-1099) Photo: Keith Woodland
. Action from Saturn Royale's 1-0 win over Pelham Arms (blue and yellow kit) in the second Adelaide Cup semi-final
Action from Saturn Royale's 1-0 win over Pelham Arms (blue and yellow kit) in the second Adelaide Cup semi-final. Picture: Keith Woodland (300421-1074) Photo: Keith Woodland
. Action from Saturn Royale's 1-0 win over Pelham Arms (blue and yellow kit) in the second Adelaide Cup semi-final
Action from Saturn Royale's 1-0 win over Pelham Arms (blue and yellow kit) in the second Adelaide Cup semi-final. Picture: Keith Woodland (300421-923) Photo: Keith Woodland
. Action from Saturn Royale's 1-0 win over Pelham Arms (blue and yellow kit) in the second Adelaide Cup semi-final
Action from Saturn Royale's 1-0 win over Pelham Arms (blue and yellow kit) in the second Adelaide Cup semi-final. Picture: Keith Woodland (300421-900) Photo: Keith Woodland
. Action from Saturn Royale's 1-0 win over Pelham Arms (blue and yellow kit) in the second Adelaide Cup semi-final
Action from Saturn Royale's 1-0 win over Pelham Arms (blue and yellow kit) in the second Adelaide Cup semi-final. Picture: Keith Woodland (300421-863) Photo: Keith Woodland
. Action from Saturn Royale's 1-0 win over Pelham Arms (blue and yellow kit) in the second Adelaide Cup semi-final
Action from Saturn Royale's 1-0 win over Pelham Arms (blue and yellow kit) in the second Adelaide Cup semi-final. Picture: Keith Woodland (300421-839) Photo: Keith Woodland
. Action from Saturn Royale's 1-0 win over Pelham Arms (blue and yellow kit) in the second Adelaide Cup semi-final
Action from Saturn Royale's 1-0 win over Pelham Arms (blue and yellow kit) in the second Adelaide Cup semi-final. Picture: Keith Woodland (300421-768) Photo: Keith Woodland
. Action from Saturn Royale's 1-0 win over Pelham Arms (blue and yellow kit) in the second Adelaide Cup semi-final
Action from Saturn Royale's 1-0 win over Pelham Arms (blue and yellow kit) in the second Adelaide Cup semi-final. Picture: Keith Woodland (300421-692) Photo: Keith Woodland
. Action from Saturn Royale's 1-0 win over Pelham Arms (blue and yellow kit) in the second Adelaide Cup semi-final
Action from Saturn Royale's 1-0 win over Pelham Arms (blue and yellow kit) in the second Adelaide Cup semi-final. Picture: Keith Woodland (300421-655) Photo: Keith Woodland
. Action from Saturn Royale's 1-0 win over Pelham Arms (blue and yellow kit) in the second Adelaide Cup semi-final
Action from Saturn Royale's 1-0 win over Pelham Arms (blue and yellow kit) in the second Adelaide Cup semi-final. Picture: Keith Woodland (300421-649) Photo: Keith Woodland
. Action from Saturn Royale's 1-0 win over Pelham Arms (blue and yellow kit) in the second Adelaide Cup semi-final
Action from Saturn Royale's 1-0 win over Pelham Arms (blue and yellow kit) in the second Adelaide Cup semi-final. Picture: Keith Woodland (300421-640) Photo: Keith Woodland
. Action from Saturn Royale's 1-0 win over Pelham Arms (blue and yellow kit) in the second Adelaide Cup semi-final
Action from Saturn Royale's 1-0 win over Pelham Arms (blue and yellow kit) in the second Adelaide Cup semi-final. Picture: Keith Woodland (300421-630) Photo: Keith Woodland
. Action from Saturn Royale's 1-0 win over Pelham Arms (blue and yellow kit) in the second Adelaide Cup semi-final
Action from Saturn Royale's 1-0 win over Pelham Arms (blue and yellow kit) in the second Adelaide Cup semi-final. Picture: Keith Woodland (300421-614) Photo: Keith Woodland
. Action from Saturn Royale's 1-0 win over Pelham Arms (blue and yellow kit) in the second Adelaide Cup semi-final
Action from Saturn Royale's 1-0 win over Pelham Arms (blue and yellow kit) in the second Adelaide Cup semi-final. Picture: Keith Woodland (300421-591) Photo: Keith Woodland
. Action from Saturn Royale's 1-0 win over Pelham Arms (blue and yellow kit) in the second Adelaide Cup semi-final
Action from Saturn Royale's 1-0 win over Pelham Arms (blue and yellow kit) in the second Adelaide Cup semi-final. Picture: Keith Woodland (300421-584) Photo: Keith Woodland
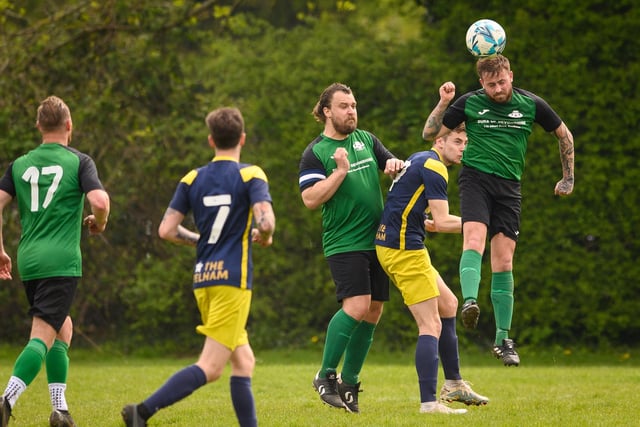
1. Action from Saturn Royale's 1-0 win over Pelham Arms (blue and yellow kit) in the second Adelaide Cup semi-final
Action from Saturn Royale's 1-0 win over Pelham Arms (blue and yellow kit) in the second Adelaide Cup semi-final. Picture: Keith Woodland (300421-1099) Photo: Keith Woodland
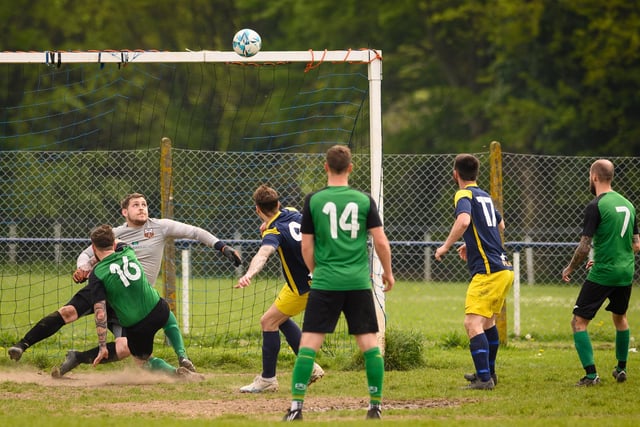
2. Action from Saturn Royale's 1-0 win over Pelham Arms (blue and yellow kit) in the second Adelaide Cup semi-final
Action from Saturn Royale's 1-0 win over Pelham Arms (blue and yellow kit) in the second Adelaide Cup semi-final. Picture: Keith Woodland (300421-1074) Photo: Keith Woodland
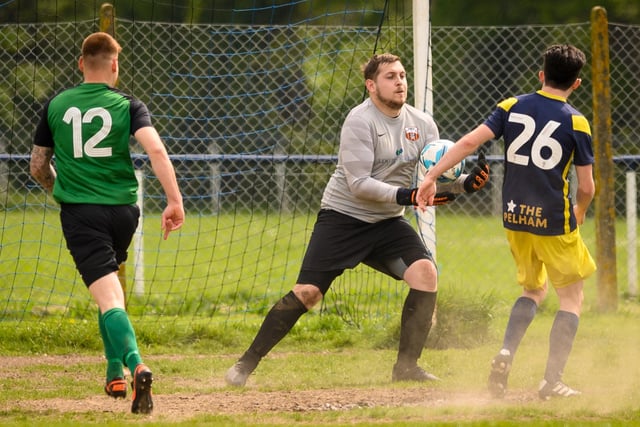
3. Action from Saturn Royale's 1-0 win over Pelham Arms (blue and yellow kit) in the second Adelaide Cup semi-final
Action from Saturn Royale's 1-0 win over Pelham Arms (blue and yellow kit) in the second Adelaide Cup semi-final. Picture: Keith Woodland (300421-923) Photo: Keith Woodland
4. Action from Saturn Royale's 1-0 win over Pelham Arms (blue and yellow kit) in the second Adelaide Cup semi-final
Action from Saturn Royale's 1-0 win over Pelham Arms (blue and yellow kit) in the second Adelaide Cup semi-final. Picture: Keith Woodland (300421-900) Photo: Keith Woodland